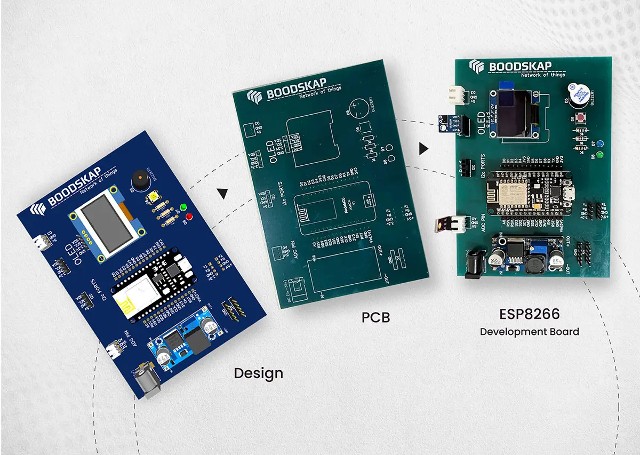
An ESP8266 development board is a small computer that can be used to develop and test applications for the ESP8266 Wi-Fi chip. The ESP8266 is a low-cost, low-power Wi-Fi chip that enables devices to connect to the internet. ESP8266 development boards are available in a variety of form factors, including modules, breakout boards, and development boards.
ESP8266 development boards typically have a built-in USB-to-serial converter, making it easy to connect the board to a computer for programming and debugging. ESP8266 development boards also often have on-board GPIO (general-purpose input/output) pins that can be used to control external devices. ESP8266 development boards are a great way to get started with the ESP8266 Wi-Fi chip. They provide an easy way to develop and test applications, and can be used to create a variety of internet-connected projects. You can buy ESP8266 Development Board from Boodskap website.
What are the features of an ESP8266 development board?
ESP8266 development boards are designed for use with the ESP8266 Wi-Fi SoC. They typically include a USB-to-serial converter, a power supply, and headers for connection to the ESP8266. Some boards also include on-board flash memory, while others rely on an external flash memory. ESP8266 development boards are a great way to get started with the ESP8266 Wi-Fi SoC. They typically include all of the necessary components to get started, including a USB-to-serial converter and a power supply. Some boards also include on-board flash memory, while others rely on an external flash memory.
The ESP8266 Wi-Fi SoC is a low-cost, low-power system-on-chip (SoC) with built-in Wi-Fi capabilities. It is widely used in a variety of IoT applications, including home automation, security, and connected devices. The ESP8266 development boards listed below are a great way to get started with the ESP8266 Wi-Fi SoC. They typically include all of the necessary components to get started, including a USB-to-serial converter and a power supply. Some boards also include on-board flash memory, while others rely on an external flash memory.
ESP8266 Development Board Features
- On-board USB-to-serial converter for programming and debugging
- On-board power supply (3.3V or 5V)
- GPIO headers for connecting to the ESP8266
- On-board flash memory (varies by board)
- External flash memory support (varies by board)
How to use an ESP8266 development board?

ESP8266 development boards are a great way to get started with programming the ESP8266. In this article, we’ll show you how to set up and use an ESP8266 development board. First, you’ll need to choose an ESP8266 development board. There are many different boards available, so we’ll just focus on one of the most popular options, the ESP8266-01. The ESP8266-01 is a great choice for a development board because it’s very inexpensive and it has a built-in antenna. It also has a few other handy features, like a reset button and a status LED.
Once you have your board, you’ll need to connect it to your computer. Most ESP8266 development boards use a micro USB connection, so you’ll just need a micro USB cable. If you’re using a Windows computer, you’ll need to install the CH340G drivers. These drivers are required for the CH340G USB-to-serial converter that’s used on many ESP8266 development boards. Once the drivers are installed, connect the ESP8266-01 to your computer using the micro USB cable. The red LED on the board should light up, indicating that it’s powered on.